Inside Mount vs Outside Mount Blinds: How to Choose
Inside Mount vs Outside Mount Blinds: How to Choose
You have picked out the perfect blinds or shades. The color is right, the material is right, the price is right. Then the order form asks a question that trips up nearly every first-time buyer: inside mount or outside mount?
This is not a cosmetic preference. The mount type you choose affects how your window treatment looks, how well it blocks light, how much of your window it covers, and whether it even fits your window in the first place. Choosing incorrectly can mean light gaps that ruin your sleep, a window treatment that looks awkward, or having to reorder entirely.
This guide covers everything you need to know about inside mount vs outside mount blinds and shades. By the end, you will know exactly which option works for your windows, how to measure for each, and how to avoid the most common mistakes.
What Is Inside Mount?
An inside mount installs the blinds or shades inside the window frame opening, between the left and right sides of the frame. The brackets attach to the top of the frame (for a top mount) or to the inside face of the frame sides (for a side mount). The window treatment sits recessed within the frame, flush with or slightly behind the front edge of the window casing.
Visual description: Imagine looking at a window from across the room. With an inside mount, the blind or shade appears to live inside the window opening. The window trim (casing) is fully visible around all four sides. The treatment looks built-in, as if it was designed as part of the window.
What Is Outside Mount?
An outside mount installs the blinds or shades on the wall surface, trim, or ceiling above and around the window opening. The treatment covers the window frame entirely and extends past it on all sides. It projects outward from the wall rather than sitting recessed within the frame.
Visual description: Looking at the same window from across the room, an outside mount blind or shade covers the window opening like a picture frame covers a canvas. The window trim may be partially or fully hidden behind the treatment. The blind appears to sit on top of the wall rather than inside it.
Inside Mount vs Outside Mount: Comparison Table
| Feature | Inside Mount | Outside Mount |
|---|---|---|
| Appearance | Clean, built-in, recessed | Bold, statement, covers frame |
| Window Trim Visibility | Fully visible | Partially or fully covered |
| Light Gaps | More likely (sides and bottom) | Fewer (extends past frame) |
| Window Depth Required | Yes (varies by product) | No depth requirement |
| Measuring Difficulty | Moderate (must be precise) | Easier (more forgiving) |
| Room Perception | Window looks original size | Window appears larger |
| Obstruction Risk | May interfere with handles/cranks | No interference |
| Wall Space Needed | None | Needs clear wall above/beside window |
| Best For | Deep window frames, showcase trim | Shallow frames, light blocking, large look |
| Hardware Visibility | Minimal (hidden in frame) | Brackets/headrail visible (use valance) |
Window Depth Requirements for Inside Mount
This is the most critical technical factor. Inside mount requires enough depth inside the window frame to accommodate the headrail (the top housing that contains the mechanism) and, in many cases, the fully extended blind or shade.
Minimum Depth by Product Type
| Product Type | Minimum Depth for Flush Inside Mount | Minimum Depth for Recessed Mount |
|---|---|---|
| Aluminum mini blinds | 3/4 inch | 1.5 inches |
| Faux wood blinds | 1.5 inches | 2.5 inches |
| Real wood blinds | 2 inches | 2.75 inches |
| Roller shades | 1 inch | 1.5 inches |
| Cellular shades | 1.5 inches | 2 inches |
| Vertical blinds | 2.5 inches | 3.5 inches |
Flush mount means the front of the headrail sits level with the front edge of the window frame. The blind or shade may project slightly into the room when tilted or lowered.
Recessed mount (also called fully recessed) means the entire product -- headrail, slats, and all -- fits entirely within the window frame depth. Nothing protrudes beyond the front edge of the frame. This is the cleanest look but requires the most depth.
How to Measure Window Depth
- Open the window (if possible) and measure from the front edge of the window frame to the glass or sash.
- Measure in three places: left side, center, and right side.
- Use the shallowest measurement as your window depth. The product must fit at the narrowest point.
- Account for any obstructions: window handles, crank mechanisms, or lock hardware that protrude from the sash.
If your window does not meet the minimum depth requirement for an inside mount, you have two choices: switch to an outside mount or choose a product with a shallower headrail profile.
When to Choose Inside Mount
Inside mount is the preferred option for most installations. Here is when it works best.
Your Window Has Adequate Depth
If your window frame has sufficient depth for the product you have selected (see the table above), inside mount will almost always look better. The treatment sits within the frame, creating a clean, intentional appearance that looks like it belongs.
You Have Attractive Window Trim
One of the biggest advantages of inside mount is that it leaves your window trim fully exposed. If your home has decorative molding, craftsman-style casings, or any trim work you want to showcase, inside mount lets the architecture speak for itself. Outside mount would cover that trim.
You Want a Streamlined Look
Inside mount minimizes visual bulk. The window treatment does not project into the room or take up wall space. For modern, minimalist, and contemporary interiors, this streamlined profile is usually the right choice.
You Are Mounting Multiple Windows Side by Side
When windows are grouped close together (mullion windows, ganged windows, or windows flanking a door), inside mounting each window individually prevents overlap and keeps clean sight lines between them. Outside mount on closely spaced windows often creates an awkward collision where the treatments overlap or nearly touch.
You Have Limited Wall Space
If there is minimal wall space between windows, or if the window is close to a corner, perpendicular wall, or built-in furniture, inside mount avoids the problem of having nowhere to extend the treatment beyond the frame.
When to Choose Outside Mount
Outside mount solves specific problems that inside mount cannot. Here is when it is the better option.
Your Windows Are Too Shallow
The most common reason to choose outside mount is insufficient window depth. Many older homes, homes with metal window frames, and homes with casement or awning windows simply do not have enough frame depth for inside mount. Outside mount requires no depth at all -- the treatment mounts on the flat wall surface or trim.
You Need Maximum Light Blocking
This is the other major advantage of outside mount. Inside-mounted blinds and shades have gaps on all four sides -- between the treatment edge and the window frame. These gaps allow light to leak in from the sides, top, and bottom. In bedrooms, nurseries, and media rooms where darkness matters, these gaps can be a significant annoyance.
Outside mount extends the treatment 2 to 4 inches beyond the window frame on each side, covering these gaps. Combined with blackout fabric, this overlap dramatically reduces light intrusion. For shift workers, light-sensitive sleepers, or anyone who needs true darkness, outside mount is often the right call.
You Want to Make Windows Appear Larger
A well-executed outside mount creates the illusion that your windows are bigger than they actually are. By extending the treatment 3 to 6 inches above the window frame and 2 to 3 inches beyond each side, the covered area appears to be the full window. When the blind or shade is raised, the actual window is fully exposed and appears larger because the eye was calibrated to the larger treatment size.
This is a standard designer technique for rooms with undersized windows. It works especially well with roller shades and cellular shades, which have a clean profile that does not call attention to the illusion.
Window Handles or Cranks Are in the Way
Casement windows, awning windows, and some double-hung windows have crank handles, lock hardware, or protruding hinges that sit inside the window frame. An inside-mounted blind or shade would collide with these obstructions, preventing the slats from closing fully or the shade from lowering completely. Outside mount clears the obstruction by sitting in front of the frame rather than inside it.
You Want to Cover an Unfinished or Damaged Frame
If your window frame is stained, damaged, or simply unattractive, outside mount conceals it. The treatment covers the frame entirely, giving the window a fresh, finished appearance without the cost of replacing the frame or trim.
You Are Covering a Non-Standard Opening
Outside mount works for openings that are not standard window frames -- such as archways, pass-throughs, room dividers, or irregularly shaped openings where inside mounting is impossible or impractical.
How to Measure for Each Mount Type
Accurate measuring is the difference between a window treatment that looks custom and one that looks wrong. The process differs for each mount type.
Measuring for Inside Mount
Width: Measure the inside width of the window frame at three points -- top, middle, and bottom. Record the narrowest measurement. Most manufacturers will factory-deduct a small amount (typically 1/4 to 1/2 inch) to ensure clearance, so provide the exact measurement without subtracting anything unless the manufacturer's instructions say otherwise.
Height: Measure the inside height of the window frame at three points -- left, center, and right. Record the longest measurement to ensure full coverage.
Depth: Measure the frame depth as described in the depth requirements section above.
Check for square: Measure the diagonals of the window opening. If they differ by more than 1/4 inch, the window is out of square. Inside mount can still work, but the blind may show a slight gap on one side. Severely out-of-square windows are better candidates for outside mount.
Measuring for Outside Mount
Width: Decide how far you want the treatment to extend beyond the window frame on each side. For standard light control, add 1.5 to 2 inches per side. For maximum light blocking, add 3 to 4 inches per side. Your total width = window opening width + overlap on both sides.
Height: Decide where the top of the treatment will sit. For a standard look, mount the brackets 2 to 3 inches above the window frame. For a taller window illusion, mount 4 to 6 inches above. Your total height = distance from the mounting point to the bottom of the window sill (or below it, if you want the treatment to extend past the sill).
Clearance: Check that the wall space above and beside the window is clear of vents, electrical outlets, trim from adjacent windows, or crown molding that would interfere with the brackets.
Light Gap Solutions
Light gaps are the most common complaint with inside-mounted window treatments. Here are the most effective solutions.
For Inside Mount Light Gaps
- Side channels: L-shaped or U-shaped tracks that attach to the window frame and hold the shade edges, eliminating side gaps. Available for roller shades and cellular shades.
- Overlap valance: A headrail valance that extends slightly beyond the front of the frame, blocking light from the top.
- Frame-sealing tape: Adhesive light-blocking strips applied to the window frame that the shade edge presses against when lowered.
For Outside Mount Light Gaps
Light gaps are less of an issue with outside mount, but they can still occur at the bottom if the shade does not sit flush against the wall. Solutions include:
- Extending the shade length 2 to 3 inches below the window sill
- Adding a bottom rail weight to keep the shade hanging flat against the wall
- Ceiling mount instead of wall mount, which eliminates the top gap entirely
Pros and Cons Summary
Inside Mount
Pros:
- Clean, built-in appearance
- Showcases window trim and molding
- Compact -- does not project into the room
- No wall space required
- Works well for grouped or closely spaced windows
- Easier to open and close the window behind the treatment
Cons:
- Requires minimum window frame depth
- More light gaps at sides and bottom
- Precise measuring required (less room for error)
- Window handles may interfere
- Cannot make windows appear larger
- Out-of-square windows may show uneven gaps
Outside Mount
Pros:
- Works with any window depth (including zero depth)
- Better light blocking (covers gaps)
- Creates the illusion of larger windows
- More forgiving of measurement errors
- Covers unattractive frames or trim
- Clears window handles and hardware
Cons:
- Covers window trim (may not be desirable)
- Projects from the wall (less streamlined)
- Headrail and brackets may be visible (valance recommended)
- Requires clear wall space above and beside the window
- Can look bulky on small windows
- May interfere with adjacent windows or walls
Room-by-Room Mount Recommendations
Bedrooms
Recommended: Outside mount
Darkness matters for sleep. Outside mount's ability to extend past the window frame and minimize light gaps makes it the better choice for bedrooms. Pair with blackout cellular shades or blackout roller shades for maximum darkness. Mount the brackets 3 to 4 inches above and 3 inches to each side of the window frame.
Living Rooms
Recommended: Inside mount (if depth allows)
Living rooms are where aesthetics carry the most weight. Inside mount shows off window trim and keeps the look clean. If your living room windows have adequate depth, inside mount is almost always the better choice. Use light-filtering shades for daytime ambiance.
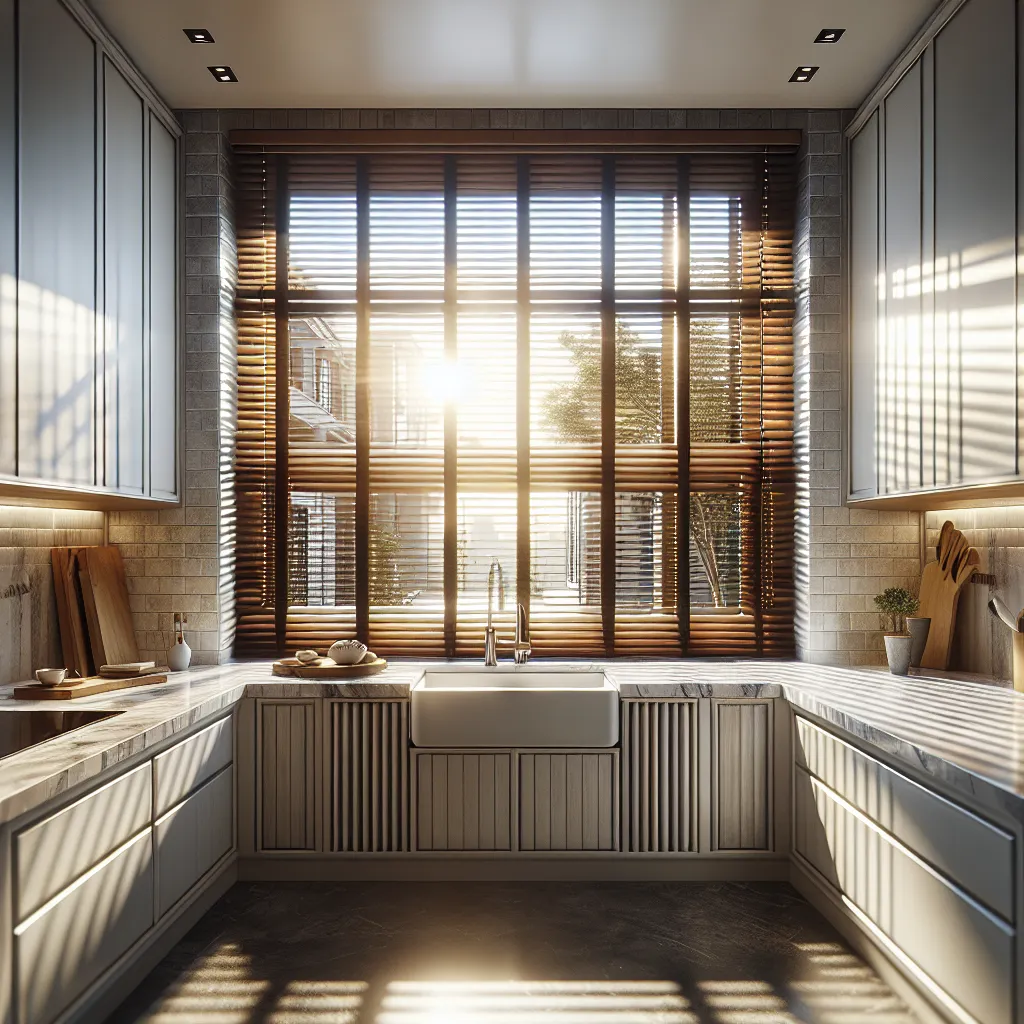
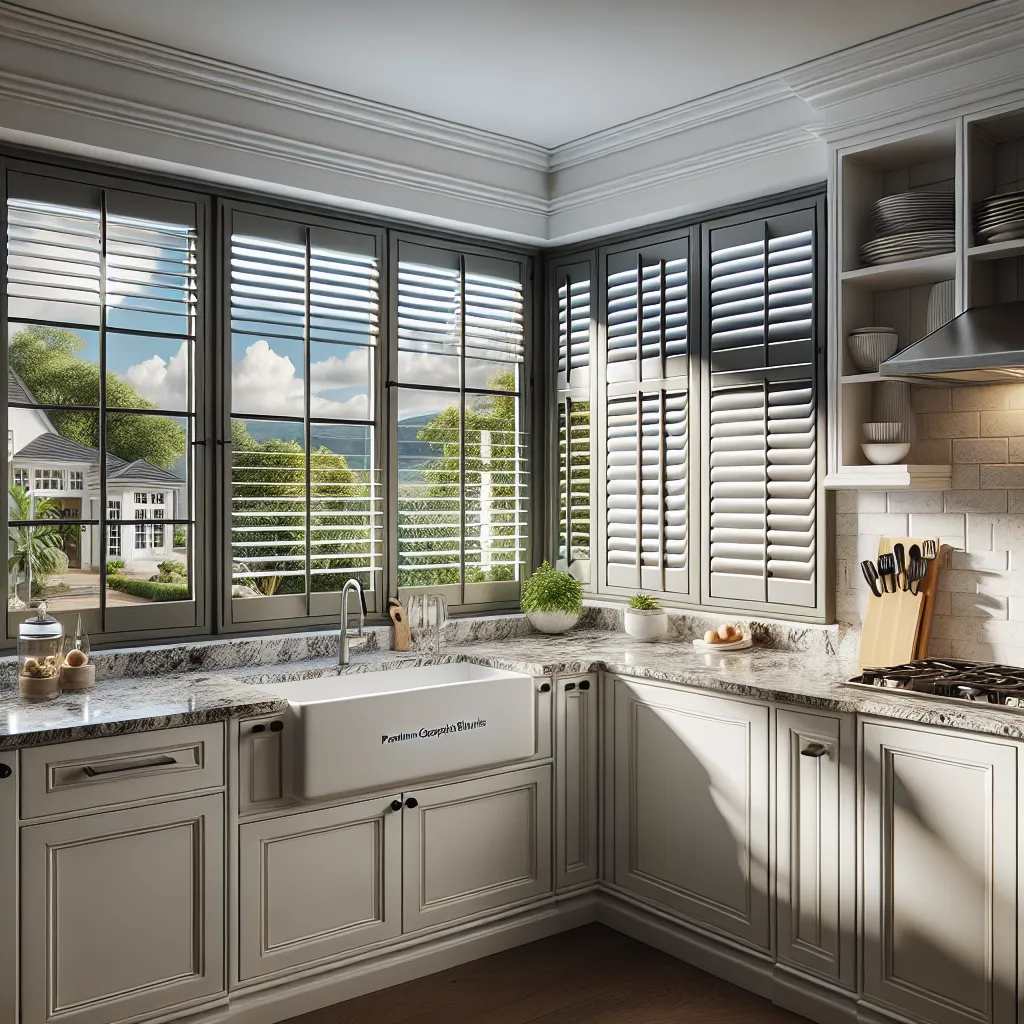
Kitchens
Recommended: Inside mount
Kitchen windows typically sit above countertops, and an outside-mounted treatment could interfere with items on the counter or cabinets flanking the window. Inside mount keeps the treatment contained within the frame. Faux wood blinds inside-mounted in kitchen windows deliver a clean, practical look.
Bathrooms
Recommended: Inside mount
Most bathroom windows are small to moderate in size, and inside mount keeps the treatment compact and proportional. Privacy is important, but light blocking is less critical than in bedrooms. Faux wood blinds are the best material choice for bathroom moisture.
Home Offices
Recommended: Inside mount or Outside mount (depends on glare)
If your office window faces south or west and receives direct sunlight on your monitor, outside mount with roller shades gives you better coverage and fewer light gaps at the sides. For east-facing or north-facing windows with moderate light, inside mount keeps the workspace looking clean and open.
Nurseries and Children's Rooms
Recommended: Outside mount
Like bedrooms, nurseries and children's rooms benefit from maximum darkness for nap times and early bedtimes. Outside mount with blackout shades creates the darkest environment. Cordless operation is essential for child safety in these rooms.
Common Mistakes to Avoid
Mistake 1: Not Measuring Depth Before Ordering Inside Mount
This is the most expensive mistake. If you order an inside mount blind or shade and your window frame is too shallow, the product will not fit. You will need to exchange it for an outside mount version, which typically means a different size and possibly a restocking fee.
Always measure your window frame depth before you order. Refer to the minimum depth table earlier in this guide.
Mistake 2: Outside Mounting Too Close to the Frame
If you mount an outside treatment directly on the frame edge or only 1/2 inch above it, you lose the benefits of outside mount. The treatment will not effectively cover light gaps, and it will not create the larger window illusion. Extend at least 2 inches above and 1.5 inches to each side for meaningful coverage.
Mistake 3: Ignoring the Reveal Depth on Inside Mount
The "reveal" is the flat surface at the top of the window frame where inside mount brackets attach. If this surface is too narrow (less than 1/2 inch), the brackets may not have enough material to grip. In older homes with rounded or beveled frame edges, this is a common problem.
Mistake 4: Forgetting About Window Operation
If your window opens inward (casement style), inside mount will block the window from opening. If the window has a crank handle that protrudes, inside mount will collide with it. Always check how your window operates before choosing a mount type.
Making Your Final Decision
Here is the simplest way to decide:
- Measure your window frame depth. If it meets the minimum for your chosen product, you can go either way. If it does not, outside mount is your only option.
- Decide if light blocking matters. If you need true darkness, outside mount provides better coverage.
- Consider your trim. If you love your window trim, choose inside mount to show it off. If the trim is plain or unattractive, outside mount covers it.
- Think about the room's style. Inside mount is cleaner and more minimal. Outside mount is bolder and makes a bigger visual statement.
Most homeowners end up choosing inside mount for their primary living spaces and outside mount for bedrooms and nurseries. There is no rule that says every window in your home needs the same mount type.
Get Help With Your Installation
If you are still unsure which mount type works best for your windows, contact our team with your window measurements and photos. We can recommend the right mount type and ensure you order the correct size the first time. You can also order free samples to see how different products look in your window frames before committing to a full order.